Converting from sysvinit to systemd

Background

Like most people, I have used sysvinit to control which services are run on boot for years. In recent years, a replacement for sysvinit called systemd has been developed and is now appearing in most Linux distributions, such Debian and Raspbian.

Systemd is designed to start system processes in parallel to achieve faster boot times. The older SysVinit started processes sequentially, meaning everything has to wait for a slow service e.g. getting an IP address through DHCP to complete, not just those services that depend on it.

If you have a Python script that you want to run every time on boot, you will have read about using rc.local. This is a simpler way of doing things than in my case where I use a full daemon mechanism. SysVinit is an old-fashioned and outdated way of doing things. This guide is aimed at users looking to migrate away from rc.local and SysVinit daemons to the new systemd way of working.

My sysvinit Python script

I have a Python script that runs as a daemon and starts up using the traditional double-forking method. In other words, you can control it using the traditional commands:
$ sudo ./myscript.py start
$ sudo ./myscript.py stop
$ sudo ./myscript.py restart
$ sudo ./myscript.py status

With systemd, your script doesn’t need to contain any daemon boilerplate code at all to handle those actions. You don’t need to:

  • design your code to run as a daemon by double-forking
  • read the start/stop/restart/status command line arguments
  • keep a PID file in /var/run
  • redirect stdout/stderr to a log file in /var/log

Systemd does all of the above for you, so all you need is your Python script as you would run it at the terminal and a simple .service file.

myscript.service file
To define your service, you need to create a .service file. This file should be stored in the directory /lib/systemd/system

Here is an example that assumes that your Python script needs network access:
[Unit]
Description=My Script
After=network-online.target syslog.target

[Service]
Type=simple
WorkingDirectory=_CURDIR_
ExecStart=_CURDIR_/myscript.py
StandardOutput=syslog
StandardError=syslog
User=myuser
Group=mygroup
Restart=on-failure

[Install]
WantedBy=multi-user.target

You need to substitute _CURDIR_ with the full path of your script.

You can set the user/group that systemd runs your script as by changing myuser and mygroup to a suitable value. Leave these lines out completely if you want to run as root.

Any output from your program that would normally appear at the console, for example error messages or informational messages from a print() statement are set up to be stored by syslog so that you can still look at them if necessary.

If your script should fail for any reason, the Restart line tells systemd to restart your service.

Whenever you change or add a service file, it is necessary to get systemd to re-read it using the command:
$ sudo systemctl daemon-reload

Shebang line
Normally in a Python script, you would have the first line stating which version of Python to use (the ‘shebang’ line). In our case, to ensure smooth logging, we add the ‘-u’ switch to disable buffering on stdout/stderr which would delay any log messages from appearing.
#!env/bin/python -u

Some useful commands

Task Old SysVinit New Systemd
Start service $ sudo service myscript.py start $ sudo systemctl start myscript
Stop service $ sudo service myscript.py stop $ sudo systemctl stop myscript
Restart service $ sudo service myscript.py restart $ sudo systemctl restart myscript
View service status $ sudo service myscript.py status $ sudo systemctl status myscript
Check log $ cat /var/log/myscript.log $ sudo journalctl -u myscript
$ cat /var/log/syslog | grep myscript
Enable on boot $ sudo chkconfig myscript.py on $ sudo systemctl enable myscript
Disable on boot $ sudo chkconfig myscript.py off $ sudo systemctl disable myscript

Conclusion
I hope there is enough here to help you migrate your Python script from sysvinit to systemd. I realise that systemd is a lot more powerful and complicated than sysvinit and that there is an awful lot more to know than what I have included here.

Remember the reasons for moving your code from Python 2 to Python3? I would say that a lot of the same reasons apply for the move from sysvinit to systemd.

If you stay with the old way of doing things, eventually both you and your code will become old and obsolete.
Installing Django in Raspbian

This is a guide to installing the following toolchain on a Raspberry Pi running Raspbian Jessie Lite:

  • Lastest version of Python (3.5.2 at time of writing)
  • Apache 2 (latest version packaged in Jessie)
  • PostgreSQL (latest version packaged in Jessie)
  • mod_wsgi (4.5.7 at time of writing)
  • Django (1.10 at time of writing)
  • Python virtual environment

It is intended as a guide to getting everything installed and configured, not as a tutorial in actually using Python, Django etc. The above toolchain is suitable for a fairly heavy duty production environment.

This guide assumes that you already understand how to code in Python and are comfortable with the command line and shell scripts. It also assumes you already know about Python virtual environments and pip. If not, a bit of reading would be recommended 😉

A summary of the steps:

  1. Build and install the latest version of Python
  2. Install Postgres
  3. Install Apache web server
  4. Build and install mod_wsgi
  5. Configure Apache to use mod_wsgi
  6. Configure Apache to serve your Django project
  7. Create a virtual environment for your Django project
  8. Start a Django project, ready for writing your project or following a tutorial

Build and install Python 3.5
The following shell script will build and install the latest version of Python for you (3.5.2 at time of writing):-

#!/bin/sh
RELEASE=3.5.2

# install dependencies
sudo apt-get install libbz2-dev liblzma-dev libsqlite3-dev libncurses5-dev libgdbm-dev zlib1g-dev libreadline-dev libssl-dev tk-dev

# download and build Python
mkdir ~/python3
cd ~/python3
wget https://www.python.org/ftp/python/$RELEASE/Python-$RELEASE.tar.xz
tar xvf Python-$RELEASE.tar.xz
cd Python-$RELEASE
./configure
make
sudo make install
sudo rm -rf ~/python3/Python-$RELEASE
cd ~

Install PostgreSQL DBMS
For this tutorial, we are using the PostgreSQL DBMS. You could quite happily use MySQL or SQLite instead if you prefer.

sudo apt-get install postgresql postgresql-server-dev-all

Install Apache web server

sudo apt-get install apache2 apache2-dev

Install mod_wsgi
Mod_wsgi is an apache module that enables the use of Python’s WSGI (web server gateway interface). In other words it lets you run Python scripts under Apache web server.

The following shell script will build and install mod_wsgi that uses the latest version of Python that you have just installed:-

RELEASE=4.5.7
wget https://github.com/GrahamDumpleton/mod_wsgi/archive/$RELEASE.tar.gz
mv $RELEASE.tar.gz mod_wsgi-$RELEASE.tar.gz
tar xvfz mod_wsgi-$RELEASE.tar.gz
cd mod_wsgi-$RELEASE
./configure --with-python=/usr/local/bin/python3
make
sudo make install
cd ..
rm -rf mod_wsgi-$RELEASE

Configure Apache to use mod_wsgi
The following shell script will add the configuration and restart Apache:-

sudo cat > /etc/apache2/mods-available/mod_wsgi.load << EOF
LoadModule wsgi_module /usr/lib/apache2/modules/mod_wsgi.so
EOF
sudo a2enmod mod_wsgi
sudo service apache2 stop
sudo service apache2 start

Configure Apache to serve your Django project
Here we assume your Django project is called ‘mysite’ and runs on the server ‘yourhost.yourdomain’. Substitute these values with more suitable values to match your project.

Create the file /etc/apache2/sites-available/mysite.conf :-

<VirtualHost *:80>
   ServerName yourhost.yourdomain
   DocumentRoot "/var/www/mysite"
   CustomLog /var/log/apache2/mysite_access.log combined
   ErrorLog /var/log/apache2/mysite_error.log

   alias /static/ /var/www/mysite/static/
   alias /media/ /var/www/mysite/media/
   alias /favicon.ico /var/www/mysite/static/favicon.ico
   alias /robots.txt /var/www/mysite/static/robots.txt
   WSGIScriptAlias / /var/www/mysite/myproject/wsgi.py

   WSGIDaemonProcess yourhost.yourdomain python-path=/var/www/mysite:/var/www/mysite/mysite:/var/www/mysite/env/lib/python3.5/site-packages
   WSGIProcessGroup yourhost.yourdomain
</VirtualHost>

Enable it with the command:

sudo a2ensite mysite
sudo service apache2 reload

Make sure there is an entry for yourhost.yourdomain in /etc/hosts
This makes sure that things still work if the DNS stops working for whatever reason. It is also faster than DNS lookups. If you are running behind a NAT router, make sure you enter your internal IP address here, not your external IP address.

sudo nano /etc/hosts

Create a directory to hold your project
Here, we create the directory under /var/www where websites normally live. The file permissions must allow suitable access by the apache user as well as write access by yourself.

sudo mkdir /var/www/mysite
sudo chown myuser:mygroup /var/www/mysite
ln -s /var/www/mysite ~/mysite

Create a virtual environment containing your Django project
Python Virtual environments are a Good Thing (TM). They allow you to control the dependencies of your project in an independent manner from any other projects you have installed. This way, you can allow different versions of Django and other Python modules for each project. If you have a device-wide installation of Python modules, it could break some of your sites when your do an upgrade command!

cd ~/mysite
pyvenv-3.5 env

Switch to your virtual environment and upgrade pip:

. env/bin/activate
pip install --upgrade pip

From this point onwards, we assume everything you do is within this virtual environment.


Create a basic requirements.txt file containing a list of the Python modules used by your Django project:

Django==1.10.*
psycopg2~=2.6

Install these Python modules in your virtual environment:

pip install -r requirements.txt

Create a Postgres user and database for your project
Note that the following shell script will delete your database and database user if it already exists! It is a good idea to have a separate user for each individual project – this way if your website is compromised, it can only affect one project.

#!/bin/sh
sudo -u postgres psql << EOF
drop database if exists mysite;
drop user if exists myuser;
create user myuser with password 'secr3t';
create database mysite with owner myuser;
EOF

Start a Django project

django-admin startproject myproject .
mkdir static

Edit the file myproject/settings.py and change the database settings to something along these lines:

DATABASES = {
    'default': {
        'ENGINE': 'django.db.backends.postgresql',
        'NAME': 'mysite',
        'USER': 'myuser',
        'PASSWORD': 'secr3t',
        'HOST': 'localhost',
    }
}

Also add/change the following settings:

STATIC_URL = '/static/'
STATIC_ROOT = os.path.join(BASE_DIR, 'static')

If you now go to your web browser and load your site, you should get the initial Django ‘It Worked!’ page.

At this point, it is probably a good idea to put your Django project into a source code repository, such as git. This is outside the scope of this guide.

From this point onwards, you are on your own. You may want to follow one of the many Django tutorials that are around – Google is your friend 🙂

Here you go for starters:
https://docs.djangoproject.com/en/1.10/intro/tutorial01/

Creating a Python Package

At Blackpool Raspberry Jam today, I taught @all_about_code the basics about turning his EduPython Python module into a Python Package on PyPi. This guide is written assuming you are using Python 3 under Raspbian or Debian Jessie.

Here is the ‘Hello, World’ of Python Packaging guides:

  • Make sure your module contains docstrings for every function, and for the module itself.  This is very useful for many reasons as we will see later – after all people need to know how to use your Python module.
  • Create a directory for your package which will contain the following files:
mypackage/
   README.txt
   LICENCE.txt
   CHANGELOG.txt
   MANIFEST.in
   setup.py
   mymodule/
      __init__.py
  • Choose a licence for your module.  (For American readers, note that in the USA you spell it ‘license’ instead).  Store a copy of your licence in the file LICENCE.txt.  There are many licences to choose from, but my personal favourite is the MIT licence because it does not have many restrictions and it is simple.  Other suitable licences for Python modules would be BSD, Apache or LGPL.  I would not use the GPL licence for a Python package because any projects that use it are forced to use the GPL licence too.  This may prevent some people from being able to use your library.
  • Create a README.txt file containing a summary of what your Python package is all about
  • Create a CHANGELOG.txt file to list all the changes in every release of your package.  That way when you release the next version, people will know what has changed. Here is a simple template to start with:
Change Log
==========

0.0.1 (dd/mm/yyyy)
------------------
- First release
  • Create a MANIFEST.in file containing the following – this tells the Python packaging mechanism which files belong to your package:
global-include *.txt *.py
  • Create a setup.py file.  This is a script that is used to compile your package and submit it to PyPi.  Here is a very simple example:
"""
Your licence goes here
"""

from setuptools import setup, find_packages

# See note below for more information about classifiers
classifiers = [
  'Development Status :: 5 - Production/Stable',
  'Intended Audience :: Education',
  'Operating System :: POSIX :: Linux',
  'License :: OSI Approved :: MIT License',
  'Programming Language :: Python :: 2.7',
  'Programming Language :: Python :: 3'
]

setup(
  name='mymodule',
  version='0.0.1',
  description='A short summary about your package',
  long_description=open('README.txt').read() + '\n\n' + open('CHANGELOG.txt').read(),
  url='',  # the URL of your package's home page e.g. github link
  author='John Smith',
  author_email='john.smith@gmail.com',
  license='MIT', # note the American spelling
  classifiers=classifiers,
  keywords='', # used when people are searching for a module, keywords separated with a space
  packages=find_packages(),
  install_requires=[''] # a list of other Python modules which this module depends on.  For example RPi.GPIO
)

For the list of classifiers that you can use, see https://pypi.python.org/pypi?%3Aaction=list_classifiers. Use as many as you think is relevant to your package.

  • Rename your module to be __init__.py within the ‘mymodule’ directory.
  • We are nearly finished now. This is probably a good point to place your package in source code control on something like Github or similar.
  • Check that a few dependencies are installed (pip and setuptools). From the command line:
pip3 list

If you need to install pip:

sudo apt-get install python3-pip

If you need to install setuptools:

sudo pip3 install setuptools
  • If this is your first time creating a Python package, you will need to create an account on PyPi. If you are creating a new Python package, you will also need to register it. You can do both by entering the following at the command line in the package directory:
python3 setup.py register
  • Finally publish your Python package. To do this, enter the following at the command line in the package directory:
python3 setup.py sdist upload
  • Anyone can now install and use your package using the command:
    • pip3 install mymodule

      In future I hope to add information on:

      • Unit testing and code coverage
      • Virtual environments
      • Using docstrings, sphinx and readthedocs.org

      There is obviously a lot more to it but this guide should get you started. For further reading:
      https://python-packaging-user-guide.readthedocs.org/

    Micropython on a Microbit using Mu

    Today I have attended a CAS workshop as an computing professional at Lancaster University.

    The object of the session was to network with teachers and have a play with Micropython on the Microbit. We worked in groups and finished the evening with a ‘show and tell’.

    The reference manual for micropython on a microbit is here. While this is essential reading, I decided it would make things easier with a summary on a single sheet of paper next to me. I created a quick reference sheet.

    There are two ways to use Python on a microbit – the online editor or the Mu editor. We chose to use Mu because it is more responsive and integrates better with the microbit.

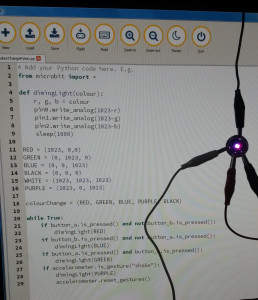
    Here is what we came up with at the end of the session:

    cas

    It is an active-low RGB LED wired up to the microbit using crocodile clips. You can change the colour by pressing different buttons on the microbit or by shaking the microbit.

    Timelapse video on a Raspberry Pi

    Here is an experiment I did on my Dad’s Raspberry Pi after reading an article in the MagPi.

    To take a timelapse video:

    $ mkdir pics
    $ raspistill -w 1920 -h 1080 -t 120000 -tl 5000 -o pics/test%04d.jpg
    

    where:

    -t is the total time to run in milliseconds
    -tl is the time interval in milliseconds between each picture

    To record 10 hour timelapse starting at 7am tomorrow (pic every 60 secs):

    $ at 7:00 AM tomorrow
    raspistill -w 1920 -h 1080 -t 36000000 -tl 60000 -o pics/test%04d.jpg
    Ctrl-D
    

    To convert the individual pictures to a video:

    $ cd pics
    $ avconv -framerate 10 -i test%04d.jpg -crf 4 -b:v 10M video.webm
    

    Here is the result (link)

    Disable screen blanking in Raspbian LXDE

    At the Raspberry Pi birthday bash this weekend, I had a Pi3 running an OpenOffice Impress presentation continuously in a loop all day on the bar. I had a problem with the screen blanking after several minutes. I fixed this using these commands in a terminal:

    $ xset s noblank
    $ xset s off
    $ xset -dpms
    

    (I discovered this by reading this)

    If you want a more permanent solution then this may help you: (link)

    Installing the latest Python from source

    Here is a shell script to install the lastest version of Python under Debian / Raspbian (3.7.4 and Stretch/Buster at the time of writing):

    #!/bin/sh
    RELEASE=3.7.4
    
    # install dependencies
    sudo apt-get install libbz2-dev liblzma-dev libsqlite3-dev libncurses5-dev libgdbm-dev zlib1g-dev libreadline-dev libssl-dev tk-dev uuid-dev libffi-dev
    
    # The following line is required for Buster but will fail harmlessly under Stretch
    sudo apt-get install libgdbm-compat-dev
    
    # download and build Python
    mkdir ~/python3
    cd ~/python3
    wget https://www.python.org/ftp/python/$RELEASE/Python-$RELEASE.tar.xz
    tar xvf Python-$RELEASE.tar.xz
    cd Python-$RELEASE
    ./configure --enable-optimizations --enable-shared
    make
    sudo make altinstall
    sudo ldconfig
    sudo rm -rf ~/python3/Python-$RELEASE
    cd ~
    

    Changelog

    • Updated to work with both Stretch and Buster
    • Updated version of Python and updated dependencies
    • ‘make altinstall’ instead of ‘make install’ – note that doing this no longer sets the default python3 to the copy you are building – you have to use python3.x instead.  I tend to use virtual environments these days to have better control over the versions in use.
    • Added –enable-optimizations to the configure step.  This makes builds much slower but you can remove this if you are impatient.
    • Added —enable-shared to the configure step.  This was needed for mod_wsgi builds and is a default option in Debian package builds anyway.